
How to Clean Keyboard Keys (Complete Guide for Every Keyboard Type)

Let’s be honest—your keyboard probably isn’t as clean as you think it is. Between snack crumbs, finger oils, dust, and everyday grime, it quietly becomes one of the dirtiest items on your desk. If you’ve ever wondered how to clean a keyboard or how to clean keyboard keys properly without damaging anything, you’re not alone.
It doesn’t matter you’re a gamer grinding long sessions, a remote worker typing all day, or a MacBook user trying to keep things pristine, this guide walks you through safe, effective, and practical ways to clean your keyboard—from quick maintenance to deep cleaning.
Why You Should Clean Your Keyboard Regularly

Cleaning your keyboard isn’t just about aesthetics—it directly affects performance, hygiene, and longevity.
Over time, dirt and debris can slip under the keys and interfere with responsiveness. For gamers, this can mean missed inputs or sticky keys at the worst possible moment. Oils from your fingers also build up on keycaps, leaving them shiny, slippery, and uncomfortable to use.
Then there’s the hygiene factor. Studies have shown that keyboards can harbor more bacteria than you’d expect, especially if you eat at your desk or rarely wipe things down. Regular cleaning helps reduce that buildup and keeps your setup feeling fresh.
If you’re serious about maintaining your gear, learning how to clean keyboard keys properly is a small habit with big impact.
Also read: How Many People Can Solve a Rubik’s Cube?
What You Need Before You Start (Keyboard Cleaner Essentials)
Before diving in, it helps to have the right tools. You don’t need anything fancy, but using proper keyboard cleaner tools makes the process safer and more effective.
Basic Cleaning Tools
- Microfiber cloth (won’t scratch surfaces)
- Soft brush or old toothbrush
- Cotton swabs
- Compressed air
Optional but Recommended
- Isopropyl alcohol (70–90%)
- Keycap puller (for mechanical keyboards)
- Gel-based keyboard cleaner
A good keyboard cleaner setup ensures you can remove dirt without pushing it deeper into the keyboard or damaging sensitive components.
Also read: E Sukan: Memahami Fenomena Sukan Elektronik di Malaysia
How to Clean a Keyboard (Quick Daily Cleaning Method)
If your keyboard just needs a refresh, this quick routine covers the basics of how to clean a keyboard safely.
Step 1: Turn Off or Unplug
Always disconnect your keyboard or power down your laptop before cleaning.
Step 2: Shake Out Debris
Flip the keyboard upside down and gently tap it to remove loose crumbs and dust.
Step 3: Use Compressed Air
Blow air between the keys to dislodge hidden debris. Short bursts work best.
Step 4: Wipe the Surface
Use a microfiber cloth to clean the key surfaces and surrounding areas.
Step 5: Disinfect Lightly
Dampen a cloth or cotton pad with isopropyl alcohol and wipe the keys.
Tip: Never spray liquid directly onto your keyboard. Always apply it to the cloth first.
This method is perfect for weekly maintenance and helps prevent buildup before it becomes a bigger issue.
Also read: How to Play Madden for Money
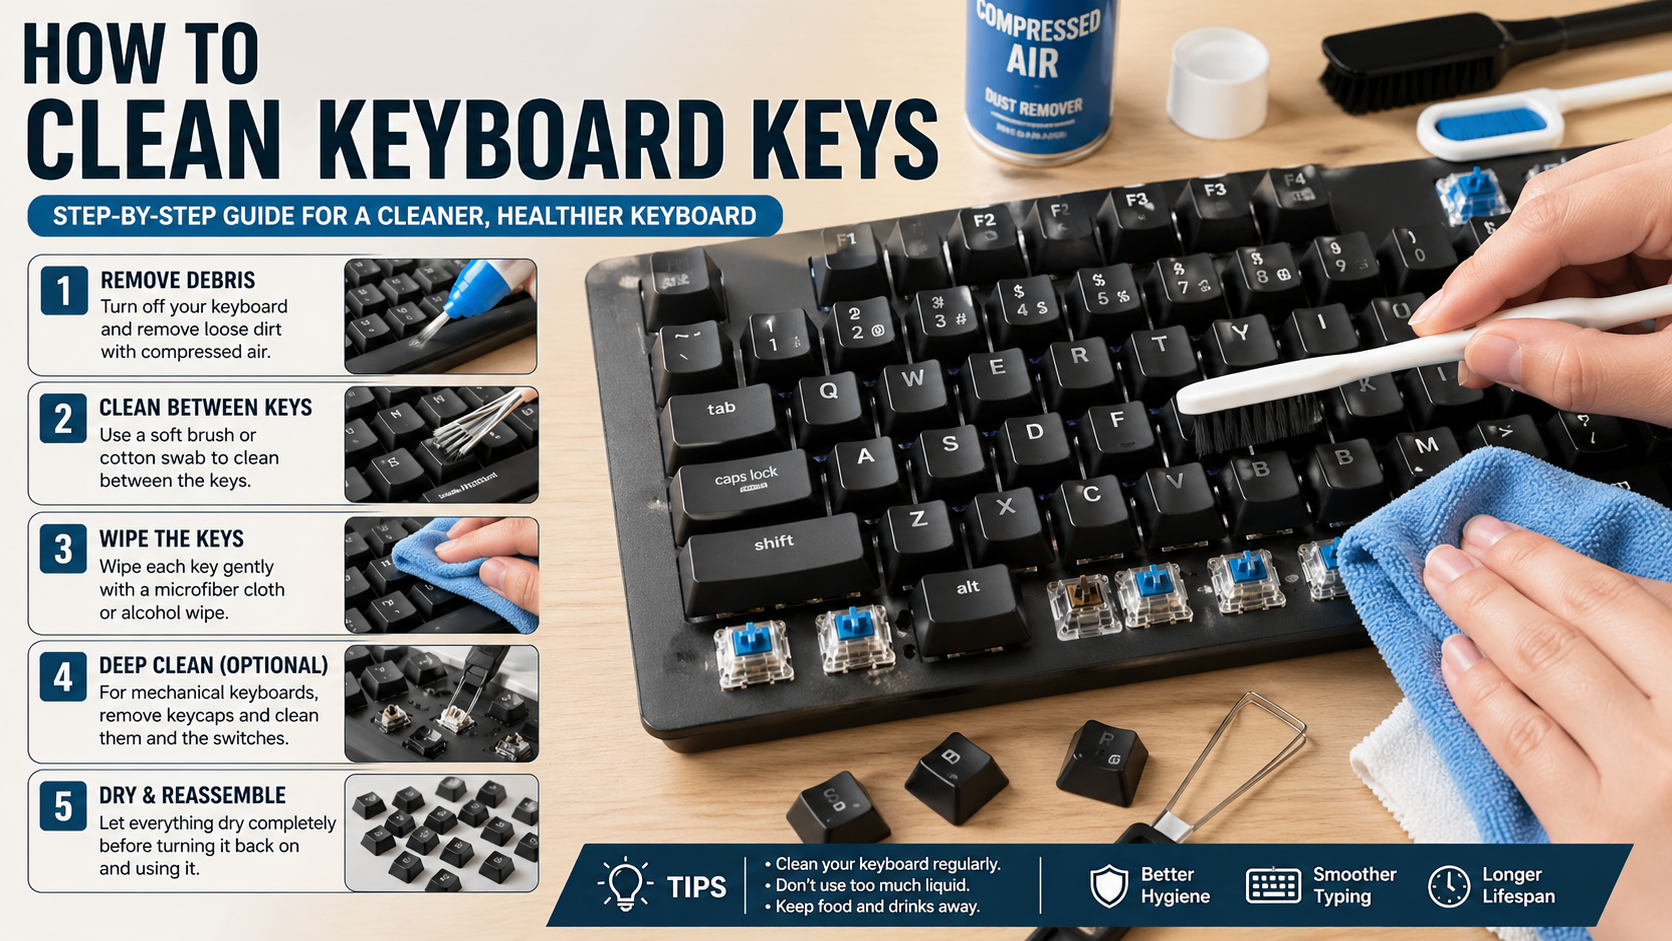
How to Clean Keyboard Keys Properly (Deep Cleaning Guide)
If your keyboard hasn’t been cleaned in a while, it’s time for a deeper approach. This is the core method for how to clean keyboard keys thoroughly.
Step 1: Remove Loose Dirt
Start with a brush and compressed air to clear out dust and debris around the keys.
Step 2: Clean Between Keys
Dip a cotton swab lightly in isopropyl alcohol and run it between the keys. This helps break down grime that builds up in tight spaces.
Step 3: Wipe Individual Keys
Use a microfiber cloth or alcohol wipe to clean each key surface. Focus on areas with visible oil or residue.
Step 4: Let It Dry Completely
Allow the keyboard to air dry before turning it back on or reconnecting it.
For most users, doing this every 1–2 weeks keeps your keyboard in top condition without needing a full teardown.
Also read: 11 Game-Changing Rocket League Tips for Beginners
How to Clean a Mechanical Keyboard (Advanced Cleaning)

Mechanical keyboards are a different beast. Their open design makes them easier to clean deeply—but also easier for dust to get inside. If you’re wondering how to clean mechanical keyboard setups properly, here’s the safe approach.
Step 1: Remove Keycaps
Use a keycap puller to gently remove each key. If it’s your first time, take a photo beforehand so you know how to reassemble everything.
Step 2: Clean the Keycaps
Soak keycaps in warm, soapy water for about 15–30 minutes. After soaking, scrub lightly with a soft brush and let them dry completely.
Step 3: Clean the Switch Area
Use compressed air and a brush to clean the exposed keyboard base. Avoid using liquid here—moisture can damage switches.
Step 4: Reassemble Carefully
Once everything is fully dry, reinstall the keycaps in their correct positions.
For gamers and enthusiasts, this deep clean every couple of months keeps your mechanical keyboard feeling like new.
Also read: What is Roguelike?
How to Clean MacBook Keyboard Safely
Laptop keyboards—especially Apple’s—require a gentler approach. If you’re looking for how to clean MacBook keyboard safely, follow these steps closely.
Step 1: Power Off the Device
Shut down your MacBook completely and unplug it.
Step 2: Tilt the Laptop
Hold your MacBook at a slight angle to help debris fall out naturally.
Step 3: Use Compressed Air
Spray compressed air in a controlled pattern across the keyboard. Use short bursts and move methodically.
Step 4: Wipe Gently
Use a microfiber cloth with a small amount of alcohol to clean the keys.
Important: MacBook keyboards are sensitive to moisture. Use minimal liquid and avoid excessive pressure.
Common Mistakes to Avoid When Cleaning a Keyboard

Even with good intentions, it’s easy to damage your keyboard if you’re not careful.
Avoid these common mistakes:
- Using too much liquid
- Cleaning while the device is powered on
- Pulling keycaps off incorrectly
- Using harsh chemicals like bleach
- Skipping drying time
A little patience goes a long way when learning how to clean keyboard setups safely.
Also read: Badass Girl Gamertags
How Often Should You Clean Your Keyboard?
The right frequency depends on how heavily you use your keyboard.
- Light users: every 2–4 weeks
- Heavy users/gamers: once a week
- Deep cleaning: every 2–3 months
If you eat at your desk or share your keyboard, you may want to clean it more often.
Also read: How Much Gaming PC Storage Do I Need
Bonus Tips to Keep Your Keyboard Clean Longer
Once your keyboard is clean, keeping it that way is much easier with a few habits:
- Avoid eating over your keyboard
- Wash your hands before use
- Use a keyboard cover (especially for laptops)
- Store your setup in a dust-free environment
These small changes reduce the need for frequent deep cleaning.
Final Thoughts
Learning how to clean keyboard keys properly is one of those simple habits that pays off immediately. Your keyboard looks better, feels better, and performs more reliably—whether you’re gaming, working, or just browsing.
From quick wipe-downs to full mechanical keyboard cleanups, the key is consistency. With the right tools and techniques, keeping your keyboard in top shape becomes quick, easy, and part of your regular setup routine.
So the next time your keys start feeling sticky or sluggish, you’ll know exactly how to clean a keyboard the right way.

